By default, all bank accounts and credit cards you link in Hurdlr are set as ‘Mixed Use’ meaning you need to tag whether each transaction is Business or Personal. However, Hurdlr allows you to set rules at the bank account/credit card level to automatically tag the transactions associated with the account as either Business or Personal.
If you have certain bank accounts or credit cards that are only used for business transactions or only used for personal transactions, you can set them as ’Business Only’ or ‘Personal Only’ accounts. By doing so, all of the transactions that pull in from that account will be automatically tagged based on how you set the account.
Understanding the Account Types
Mixed Use Account Type
With this account type selected, you’ll be prompted to tag each transaction as ‘Business’ or as ‘Personal’ when it pulls into Hurdlr. You can still set expense rules for specific transactions to help you automate the tagging of your transactions.
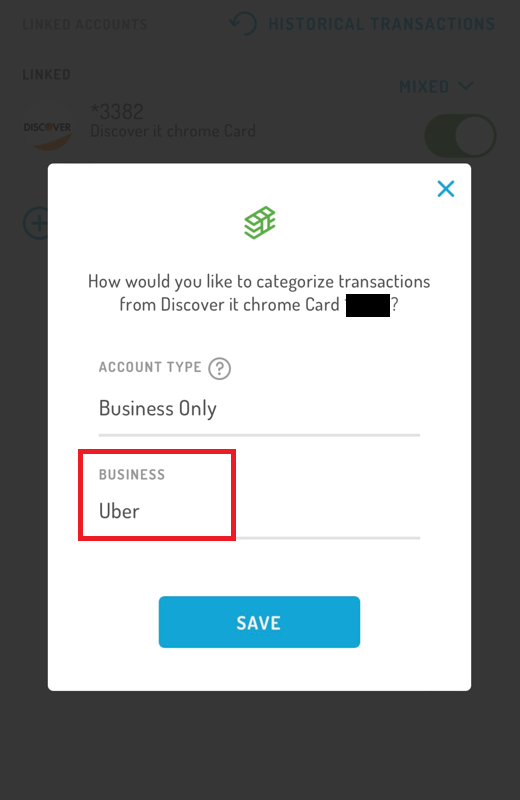
Business Only Account Type
With this account type selected, transactions from that account will automatically be tagged as Business when they pull into Hurdlr. If you have multiple businesses and have separate bank accounts or credit cards per business, you can even specify which business is associated with which bank account/credit card.
Personal Only Account Type
With this account type selected, your transactions from that account will automatically be tagged as ‘Personal’ when they pull into Hurdlr.
To Set the Account Type for an Account
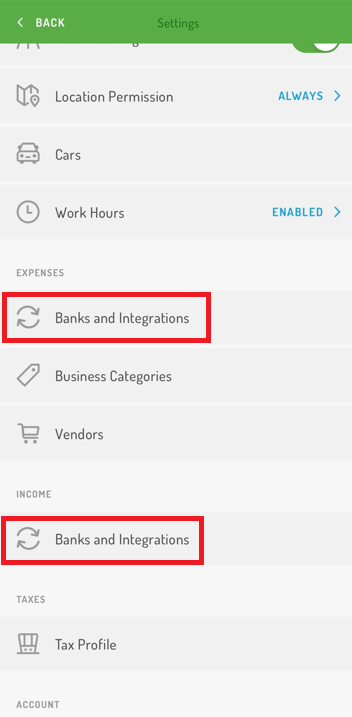
On the Mobile App
On the Mobile App
Tap the 3 dots icon in the top left corner
Select ‘Banks and Integrations’
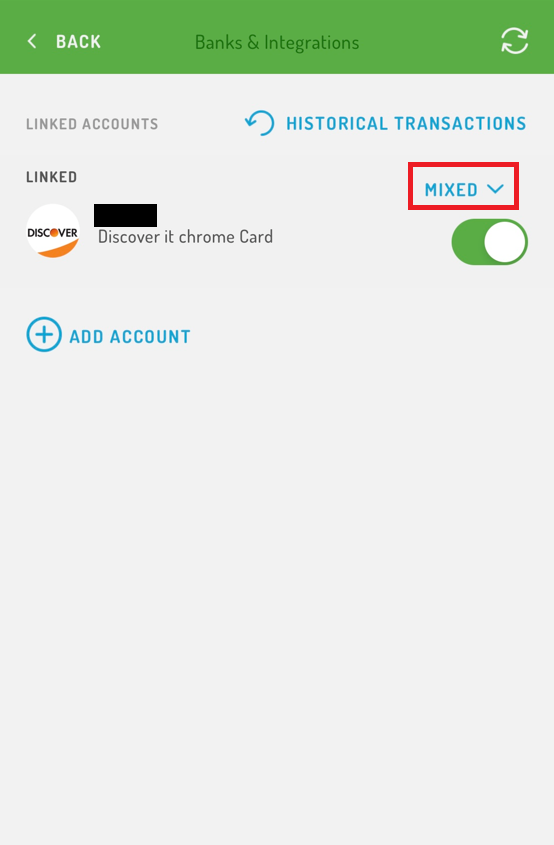
Click the blue arrow next to the specific account
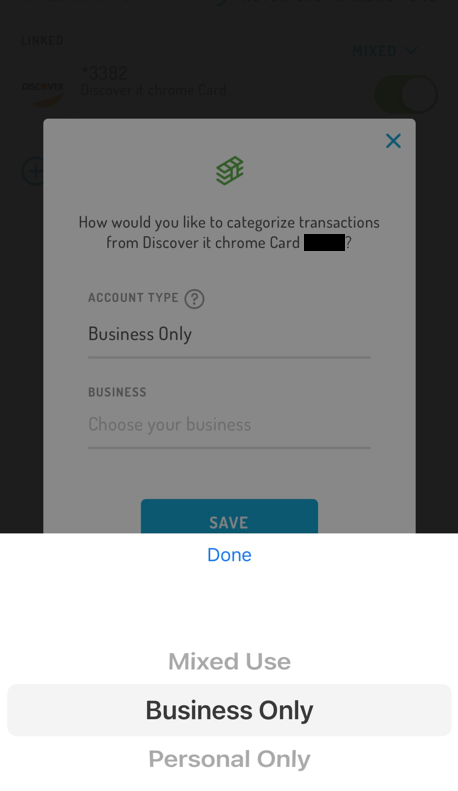
Choose if you want each specific account to be ‘Mixed Use’, ‘Business Only’, or ‘Personal Only’
If selecting ‘Business Only’ and you have multiple businesses, select a Business (you can also select a Client if applicable)
Tap the ‘Save’ button
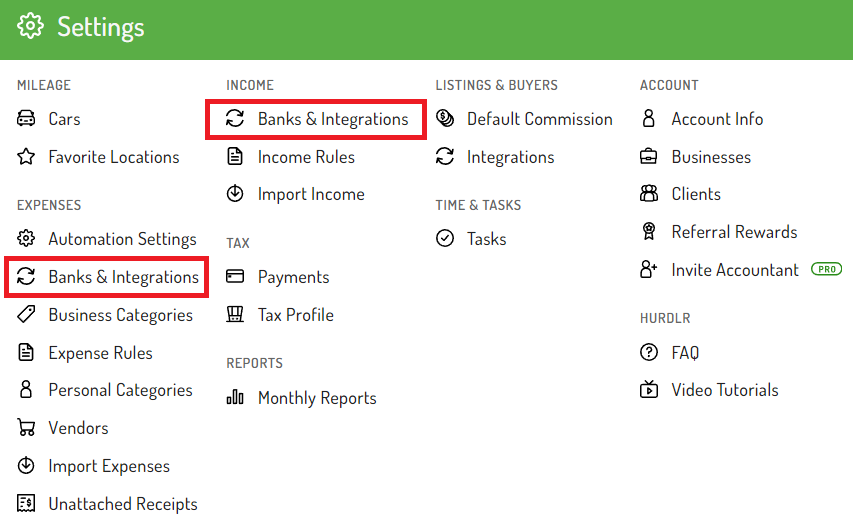
On the Web App
On the Web App
Click on the gear icon in the top right corner
Select ‘Banks and Integrations’
Click the gear icon next to the account you want to set the account type for
Set the ‘Account Type’ field
If selecting ‘Business Only’ and you have multiple businesses, select a Business (you can also select a Client if applicable)
Click the ‘Save’ button at the bottom